
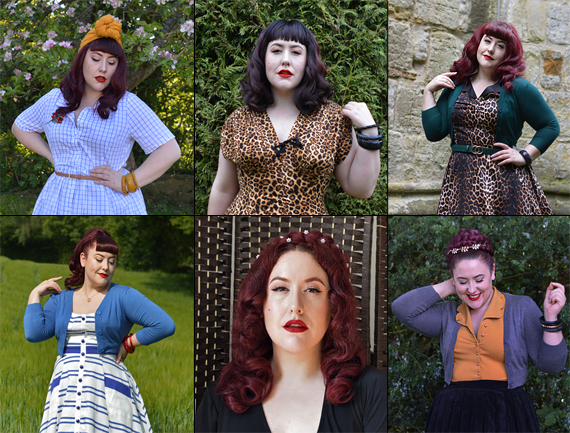
Once upon a time the only hairstyle I rocked as a pinup was my brushed out pincurl sets. It worked for me well enough and it was something I was so comfortable with that I didn’t want to dedicate any time or effort into experimenting with different hairstyles and accessories. That changed in 2016 when I experienced a brief brush with Alopecia (here’s the full post about my experience.)
While I was ultimately lucky that my bald spot was small and didn’t grow larger, that I didn’t gain others and that my hair began to regrow within a month, at the time my natural instincts to both worry and prepare lead me to experiment with wigs and to clip-in bangs/fringes. Experimenting with both of those, even long after my hair had regrown and the Alopecia was behind me, allowed me to develop a system of fall-back options for styling my hair on days when I was too short on time or motivation to utilise my favourite pincurls-and-brush-out style.
These days, those hair pieces already mentioned are also joined by bulking braiding bundles, faux and real hair ponytails, buns and plaits, as well as hand made turbans to create an array of options that allow me to be lazy, give my hair a styling break, save time, and create diversity in my look. I’ll be showcasing each item for you in this post, as well as giving you information on where to find them.
Wigs
When it comes to wigs there’s a wide world of variety that I am not remotely qualified to educate anyone on fully, but there’s a couple things I’ve learned that I can pass on. The main distinction you will find in wigs is whether they are made from real or synthetic hair. There’s pros and cons to both, and it’s those benefits and drawbacks that will determine whether a wig will work for you and your needs.
My Irresistible Me 16 inch Rosewood 99J 100% density full lace wig
The basic points are that a human hair wig looks most realistic when worn, because, duh, it uses real hair, and this also means it can be styled however you want each time you wear it, as well as having the benefit that it can be coloured or bleached. The drawbacks are that they are more expensive than synthetic styles, it’s harder to create a long-lasting style in the hair, and that achieving a natural looking hairline and scalp in a lace front can take a lot of time, effort and money, the latter if you’re paying a stylist to achieve it for you.
My Irresistible Me Rosewood 99J 100% density 16 inches full lace wig exactly as it arrived
I have one real hair wig which I bought when I had my little alopecia bald spot, in worried anticipation of the possibility that I might lose a lot of hair, which I didn’t. I ordered it from Irresistible Me, which also offers clip in and tape in extensions. My wig is their full lace wig in 100% density, shade Rosewood 99J, and 16 inches long. At the time I ordered it they had a deal on that meant the wig cost me $237 rather than $339. The website wasn’t as transparent with their make and quality control times as the process claimed to be, so it took three months total before my wig arrived.
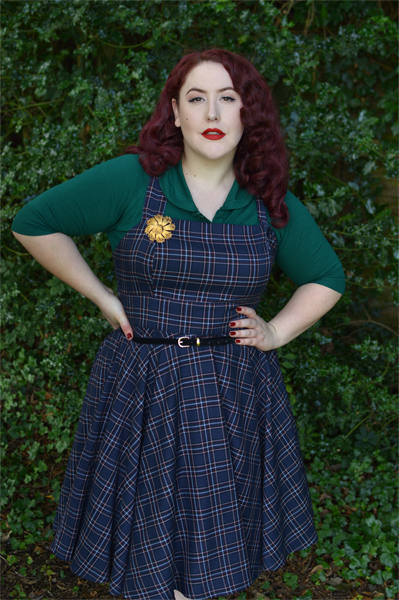
My Irresistible Me wig with my hair styled into bumper bangs
Upon arrival it was exactly as advertised, and you can see from this picture above that it arrived with the lace needing to be cut and with plenty of baby hairs. Stupidly, I cut a lot of these baby hairs too short or plucked them out in an attempt to try to make the hairline look more natural, and then had to try to create more babyhairs myself which didn’t quite live up to those the wig had arrived with. So, my advice would be that if you’re dealing with a wig for the first time, don’t try to alter the hairline, bleach the knots or make the scalp look more natural yourself without first gaining a lot of experience in these areas, and it’s probably best you pay a professional stylist to do these things for you.

My Irresistible Me wig worn with a pair of self-cut and self-coloured real hair clip-in bangs, details of which are below in the clip-in bangs section
I’ve never been 100% happy with how dense the hairline looks compared to my natural hairline, which has an almost zig zag shape to it and has a natural sparseness in some areas, and I’ve not yet developed the right knack for getting the lace to sit tightly flush against my skin to look more natural there as a hairline (there’s a whole area of research required for that part too, including various glues and tapes you can use to help.) Wearing it is definitely passable for blog pictures, but I would feel self-conscious about whether the hairline read as natural if wearing it out in public. As such, these days I tend to use this wig mostly as a half wig, setting it a couple inches back on my head and styling the front part of my hair with it to look natural, or by using clip in bangs or bumper bangs, so that the hairline is hidden.
My Irresistible Me Rosewood 99J 100% density full lace wig worn as a half wig, with the front 2 inches of my hair curled and styled to blend together with it
I use this wig a lot for blog shoots because it cuts down on the time it takes for me to prepare for them, eliminating the need for me to pincurl my hair the night before a shoot as well as style it the morning of. It’s especially useful when I have social plans the night before a blog shoot, because instead of having to wear my hair a certain way (or, worse case scenario, in pincurls) when I go out, I can set the wig a day or two in advance when I do have time, wear my hair however I like when I go out, and then simply style and wear the wig in the morning for the blog shoot. I often don’t even need to fully set the wig, as it’s typically still got waves or some curls left in it from the last time I styled it, so I can frequently make-do with not setting it freshly for each shoot and I can still achieve a nice style, especially on days I use a bumper bang or a clip in fringe.
My Divatress Bobbi Bass Synthetic Bridgett wig in shade 99J Black Cherry
Synthetic wigs are cheaper by far, and while many can be heat styled to a certain temperature as long as you ensure they are heat safe wigs, if you choose the style of hair (straight, wavy, curled, etc) that you would most want to wear then they don’t need to be styled, saving you time and effort. Like a real hair wig, they would still need to be washed and conditioned for maintenance over time with special wig shampoos, but they’re a quick and easy way to achieve a finished look, especially if you choose a wig that has a fringe so that you don’t have to worry about a natural looking hairline. The obvious downside of a synthetic wig compared to real hair wig is that the hair itself doesn’t look real; a good synthetic hair will just look a bit unnaturally shiny, while bad synthetic hair will look like Barbie plastic hair. If you want a wig in a bright, unnatural colour that isn’t a big deal, but if you want a wig that matches your natural hair colour so you can use it on days you won’t be able to style your hair, then the shine might be a bit off-putting. Some of the shine can be dulled by using some dry shampoo on the wig, though, just to make it look a bit more natural.

My eBay green lace front wig
I have a few synthetic wigs. One of them, this green one on the right, I bought purely for the fun of having a green coloured wig, as I’m not someone who would ever consider colouring my own hair a colour like that, yet I liked the idea of being able to dip in and out of a fun colour when I wanted. This wig is one I bought on eBay for around £23, and it has a lace front to make the hairline look more natural. I actually prefer the hairline of this cheap wig to my $300+ real hair Irresistible Me wig.

My Divatress.com FreeTress Equal Wig – Green Cap 012 in shade PW99J350 (I trimmed the bangs to be a bit shorter and blunter)
I have two other wigs from Divatress.com, both bought on sale for under $50 each, that I bought specifically because they have fringes, meaning there won’t be any visible hairline for me to worry about looking realistic. I find these wigs most useful for mid-week meet-ups with my friends, when I can’t be bothered to wear my hair in pincurls all day at work to achieve an evening brush-out, or when there simply won’t be time before socialising to fully style my own hair. Throwing on a wig instead is a lot easier, and I’ve even used them for blog shoots when I felt they especially fit the aesthetic I was going for, or, in one case, when I was so ill (above) that I couldn’t face the extra time it would take to also style by hair in addition to the energy it required to do my makeup and shoot the pictures.
Clip In Extensions
Wigs are obviously more of a commitment both in price, upkeep and the effort/cost it takes to achieve a natural look when wearing them, so if you only want to add length or volume to your hair on occasion then clip-in extensions are a great option. I’ve covered them in-depth in the past in their own blog post, including how to set them and brush out with your own hair, so it’s best to visit that post for that information rather me repeating myself here.
As an additional note, single clip pieces can also be great for use in updos if you have fine hair or struggle with using backcombing to bulk out your styles. Just be sure to hide the clip end well in your roots as you style your hair.
A poodle-do using a few single-clip extension pieces to create more volume and curls in my fine hair
Faux Bangs
 Clip in fringes/bangs are available made from synthetic or real hair. As with wigs, synthetic hair is cheaper, but if you have an uncommon or unnatural hair colour you likely won’t be able to find a perfect shade match in synthetic bangs. Even if you do, synthetic fringes will look okay in photos but most likely will look fake next to your real hair. Real hair fringes are more expensive, but the benefit is you can colour them to match your exact hair shade, as well as wash and style them as needed.
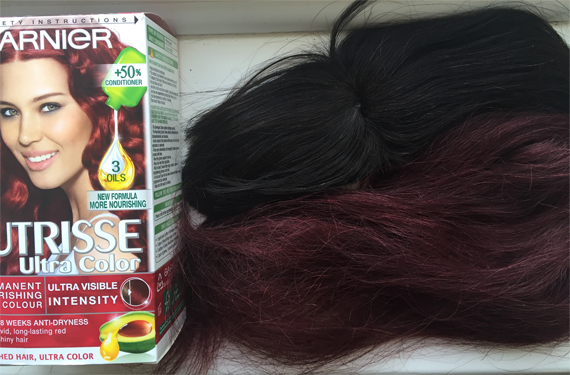
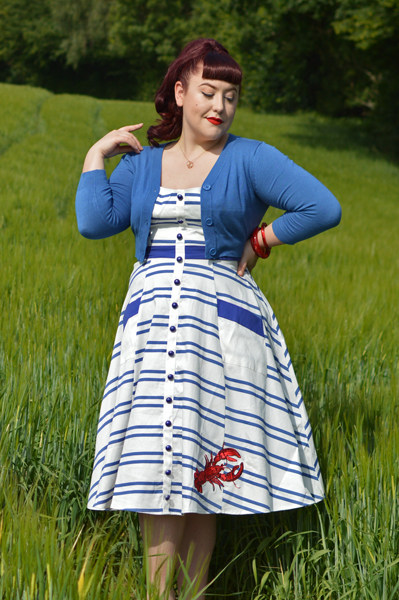
Because I use Garnier Nutriesse Ultracolor home dye in the shade Vibrant Red it’s near impossible to find clip-in bangs that are available ready in the correct shade to match my hair. When I got Alopecia I ordered a pair of Classy Rebel clip in bangs (review here), but they were very pricey especially when adding in international shipping and customs fees, and then when they arrived the natural virgin shade I had ordered was such a dark colour that it then took additional time and money to pay my hairdresser to lift them before I could colour over them with my home colour.
The Classy Rebel natural hair, above, compared with the shade of my own hair and the clip-in extensions I wear, below.

Wearing my real hair clip-in bangs from eBay which I cut and coloured myself
Since then I’ve made myself a set of faux bangs that I feel are a better length for my face and are a better colour match for my hair. When colouring hair to match your own you need to start with a hair piece that is the same colour or lighter than your own hair colour, otherwise you will have to bleach/lift the hair before you can colour it to your shade.
When making my own set I ordered a real hair clip-in fringe on eBay for £12.99, knowing I would need to cut and colour them myself. At the time no light or medium browns were available so I ordered a honey blonde pair. I coloured them with my usual Garnier shade, but they were too bright a red for a close hair match so I used a semi-permanent medium brown box dye to dye over them to bring the redness down nearer my own hair, which worked perfectly. I then used a pair of hair scissors (not standard scissors) and some men’s clippers to cut the bangs into a blunt Bettie Bangs-esque style. This Instagram video by hairstylist ILoveLucie shows you how using hair trimmers can help you get a clean cut.
Since then I’ve decided to make myself a pair of V-shaped bangs. This time when ordering my second pair I chose a medium brown shade which took my Garnier box shade well and required no further colour tweaking to achieve my colour match. I’m currently halfway through the process of cutting them into V-bangs so I don’t have any finished pictures to share with you, but I hope to soon.
Faux Ponytails
Wearing my claw faux ponytail and self-cut and -coloured clip in bangs
When buying faux-hair pieces of any kind, the universally used shade 99J can sometimes be very plum and other times quite red, so while I tend to stick to that colour option when it’s available, it doesn’t always produce a great colour match for my hair. Several times in the past I’ve bought synthetic ponytails in that colour which were so wildly different from my real hair that eventually I realised I would have to invest in a real hair ponytail if I wanted to achieve a good colour match, because real hair would mean I could colour or lift the hair if necessary to achieve the right shade match.
In the past I always made a mess of using wrap style fake ponytails, mostly because my natural hair is voluminously wavy/curly, so it always found a way to peak out from under the fake ponytail and look odd. I decided a claw clip style ponytail would work better for me, because then I could twist my hair into the smallest bun it would achieve, clip the claw over the top, and the hair would have an uninterrupted waterfall flow to it, secure against my head. I wanted the ponytail to be voluminous and long enough that it looked nice and thick, but achieving that in human hair would use a lot of it, resulting in an expensive ponytail, most likely costing upwards of £80 from standard hair sites. So, as always, I went to eBay.
I bought a 16 inch (85g) claw ponytail in shade 99J, which cost around £30. When it arrived it was exactly what I wanted except perhaps not quite as voluminous as I hoped it would be, so I clipped some of my single clip Remy clip-in extensions into the middle of the hair between the tracks where the clips would be hidden, adding extra bulk to the piece. It worked brilliantly, and I can still remove those clip-ins if I need them for something else and replace them again with ease. Additionally, because the ponytail is real hair I can style it to be straight or curly as I wish.
Faux Buns
Wearing a large plaited style clip-in faux bun, with two plaits wrapped around it fashioned from loose bulk braiding bundles
Finding a faux bun in my hair shade is really difficult. Unlike most other clip-in faux hair pieces, finding these in real hair is much more difficult, and if you could it would then be a nightmare or impossible to colour yourself. I’ve only ever found one or two different clip-in buns that are decent matches for my hair, and of course shopping for them online makes it harder still to determine what really will work in person, given the difference between monitor and screen colours to real life products.
Still, if you have an unusual hair colour and are willing to put the time in to search for a bun in the right colour, size and style that you want, it’s another hair piece that adds a lot of variety and ease to your arsenal of tricks. If you’re lucky enough to have a ‘normal’ natural hair colour, you’ll find it much easier to find a clip in bun that works for you.
The bun I’m wearing above is a large braided style that I found online more than 3 years ago now, so I’m afraid I don’t have a link for you. I’ve wrapped two faux hair plaits around it that I created myself (info in the Bulk Braiding Bundles section below) to create an even bigger, more dramatic braid mound, so to speak.
Bulk Braiding Bundles

A Dark Red Wine braiding bundle formed as one plait, worn as a braid crown to cover the front of my Irresistible Me Rosewood 99J full lace wig, which is worn an inch back onto my head to show my natural parting but add bulk and length to my overall hairstyle
Typically used by POC to add bulk, length or different colours to braids, I came across bulking bundles while trying to search for a wrap around ponytail I could use to function as a large plait I could clip in to other hairstyles. These braiding bundles are available in real or synthetic hair, but they come as loose strands so that they can be added in to braids for the previously mentioned reasons. I found a synthetic bundle on eBay that was a close match to my hair (shade Deep Wine Red) and ordered 5 bundles. I tied a hairband around the end of one bundle then plaited the whole length and tied the other end up with another hairband. I’ve done this to three of the bundles with varying degrees of tightness to the plait so that they form different thicknesses of plaits.
Wearing a bulk braiding bundle plaited by itself as a crown-braid decorated with jewelled bridal hair pins
Now, I’m able to clip these individual plaits into my hair using standard hair grips to become a feature of different hairstyles. My favourites ways to use the plaits are as a crown-braid, as pictured above, or wrapped around a real or faux bun, as pictured in the faux buns section above, to add extra volume and detail to the look. You can even add little jewelled bridal hairpins into the plait, as I have done pictured here on the left, for more formal or dramatic styles.
Turbans
One of my handmade full-coverage turbans, worn over self-cut and -coloured clip-in bangs and my Irresistible Me wig
I’ve never been much of a headscarf-wearing pinup because I don’t really like how they look on me and it annoys me when they inevitably slip about on my head. Turbans, though, make for a great addition to an up-do when you only want to style the front part of your hair, or to cover hair that’s in need of a wash or won’t co-operate that day. There are many hand-made turban sellers on the vintage scene, most of them selling on Etsy, but even though I know the benefit of having turbans on hand for the above scenarios, I also know myself well enough to know I won’t wear them very often because I don’t feel they work well on me with most of the outfit styles I most like to wear. As such, I couldn’t justify spending £20-30 per turban on multiple colours just so I would have a reasonable variety that would work across my wardrobe for the rare occasion I did fancy wearing one.
So, it was crafty Amy time. I decided making my own out of stretch jersey fabric would work best, especially as I could then source the correct shades that would exactly match certain colours in my wardrobe, rather than trying to suss out whether an online photo was the precise shade of bronzey-mustard I need to match my favourite cardigan. Half a meter of jersey fabric works out as enough to make both a full coverage and a head band style turban, so I bought mustard, burgundy and black jersey. Prices for plain fabrics will vary depending upon the thickness and quality of the fabric used, but on average I paid £3-5 per shade.
Making the turbans was easy. You’ll have to do some hands-on practical measuring of wrapping the fabric around your head to know exactly what will work for you, and I think it’ll probably be easier for you to suss it all out yourself rather than try to follow my instructions without any pictures to accompany them.
For me, I simply folded up the fabric into halves or thirds to achieve the desired thickness for the headband or full coverage styles. With the fabric folded correctly, I found the centre of the length and placed that at the centre back of my head. Then I pulled each side of the fabric around my head and tied it to the level of tightness I felt was both comfortable but also wouldn’t slip off my head. Using a hairtie, I carefully tied the band around the fabric at the top of my head to maintain the level of tightness I wanted the headband to be, and to mark the spot I would need to sew the two sides of band together in place.
Once sewn securely, I removed the hairtie and decided what style of knot, bow or scrunch I wanted the turban to have, and how big. Using the excess fabric, I tied the two loose ends in a simple knot one or two times, then scrunched the remaining fabric deliberately into the shape I wanted around the existing knot, pinning where necessary to keep the fabric in the shape I wanted it to maintain. Once all the fabric was used up, the knot looked the way I wanted and the ends were tucked neatly out of sight, I used a strong thread to tack each wave into place, making sure to keep the stitches hidden, because no one likes visible stitchwork. Altogether it probably took 15-30 minutes depending on the size and intricacy of the knot style I had created, and I had 6 turbans to show for less than the cost of one bought elsewhere.
You can, of course, buy turbans in many places that don’t feature these dramatic knot fronts. A classic, sleek turban that sits close to the skull and often features pleats across the cap can be found in many different fabric finishes and colours, not only very cheaply on eBay often for less than £4 a turban, but also from some vintage-style brands, like Voodoo Vixen. A black or dark green velvet turban like this works brilliantly in autumn and winter, especially if you add a crystal brooch to the centre as a focal point for glitzy events.
………………………………………………………………………
And there we have it, all my little tips, tricks and bits used to achieve vintage style hairstyles with minimal effort and time. Are there any other hair pieces you use to cheat your way to fabulousness?

Excellent and thoroughly comprehensive! My fringe is still in the box awaiting cut, colour and courage! Must take the plunge, your bangs always look so devilishly good.
LikeLike
I always sit with my fringe in the box for ages too, worried about getting it wrong! Definitely start cutting longer than you want it to be so you have extra room to mess up and correct yourself to get it the shape you want, then you only have to carefully cut it shorter in the right shape once you achieve it, rather than making it too short trying to correct your mistakes!
LikeLike
I loved this post! And by the way you are beautiful as hell!! 😍❤️ I wear wigs around my house and when I’m feeling ballsy I’ll wear them out to the grocery or something, but I still haven’t mastered the confidence to wear wigs in public enough. I’m shy, and have anxiety about EVERYTHING. “What if it slips back?” “What if someone can tell?” Etc etc. but anyway, great post. 😊
LikeLike
I’m the same, the idea of wearing a wig fully out in public makes me nervous because I don’t feel I’ve perfected a natural hairline on mine or a super secure way to wear it. I’m tempted to cut bangs into my human hair wig because then I don’t have to worry about the hairline, but I’m scared to ruin it!
LikeLike
Love the shade of your hair extensions! I’m using a similar shade extension, Burgundy Red 20-inch clip-ins from Zala hair (https://www.zalahair.com/).
LikeLike